The 5-Day “Thanks-Cleaning” Game Plan

Insurance doesn’t have to be boring. That’s why we hired Greg Lewerer to be our main insurance writer. Greg specializes in making mundane subjects entertaining. While still giving the needed information.
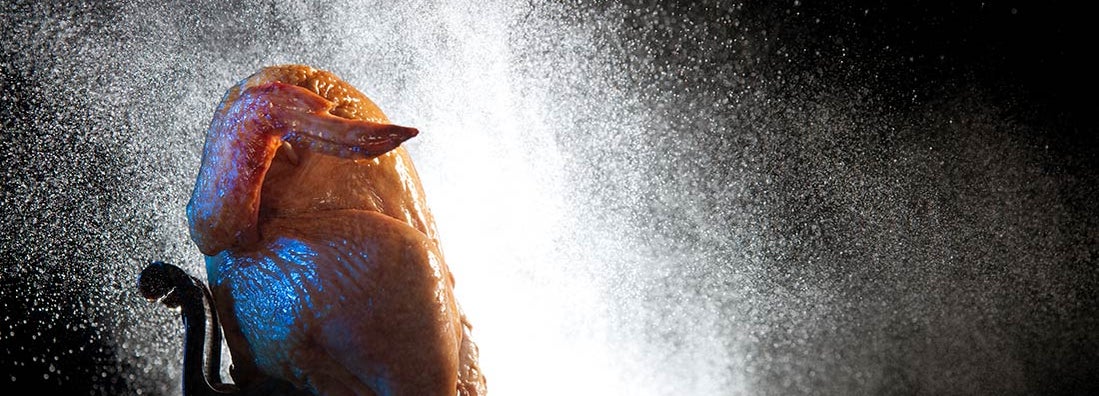
It’s that time of year again, when everybody realizes that they have a giant list of holiday to-dos and the anxiety of thinking they might not have time to do them all. The dirty jerk-bomb that tops the list is CLEANING. And not the C+ once-through that keeps the smells away. We’re talking a deep clean that would make a judgmental, white-gloved mother-in-law blush.
So how do you get your place so fresh and so clean, clean without turning into a holiday grump and/or hating everybody? It’s simple. You break up the bulk and tackle it over a 5-day period.
And even if you’re not planning on having a holiday parrty (yes, with two Rs), you should always be prepared for an ol’ friend popping by. Or at the very least, just freeing yourself from the giant or moderately-sized pile of yuk you’re currently living in.
Okay, now you’re probably thinking to yourself, “Yeah, get to the point. Gimme the goods.” Well, without further delay, here is your helpful 5-day “Thanks-cleaning” game plan.
Day 1: Get Nerdy With A Game Plan

Kicking off your cleaning with a game plan is essential. It helps with efficiency and reduces the stress of trying to think of and not forget everything. Get a notebook, paper, tablet or smart device. And don’t be afraid to go full nerd with a cleaning blueprint.
Step 1: Take inventory of tasks
Go room to room and write down the hot mess each one has going on. Start with the clutter, maybe even offer your future self some suggestions on where to put it. Then jot down everything that will need to be cleaned, even little nitty gritty things. AND don’t forget about laundry. Do it as you go or it will build up.
Step 2: Break up the responsibilities
If you’re lucky you won’t be doing this alone. If you are, maybe skip this section. Otherwise, after inventory has been taken, break up the tasks and assign them accordingly.
Helpful tip: If you have kids, assign the biggest lifts and grossest tasks to the kid(s) in need of having their manners checked or attitudes adjusted.
Step 3: Checking schedules
You have the list and have assigned the tasks. Now it’s time to set deadlines, or to sound less threatening, let’s call them timelines. If there are scheduling conflicts that will throw a wrench in this 5-day cleansing, adjust the plan where you see fit.
Step 4: Compile a list of the supplies you’ll need
Most people will have the usual suspects of household cleaners, but to avoid running out or to make things easier, load up on whatever you need to get the job done.
Helpful tip: Suggested supplies include window cleaner, 20 cleaning rags (the more rags the better), general disinfectant spray, wood surface cleaner and a floor cleaner that won’t leave a sticky film or hazy residue.
Day 2: Tame The Clutter

It’s Day 2, and thankfully you only have 2 steps to complete, but they can be mentally and emotionally overwhelming. This might take some critical thinking skills and creative problem solving, but deep breaths. And remember, stick to your game plan and believe in yourself.
Step 1: Straighten up and store it out of sight
Start by putting things back where they belong. For the new out-of-place what-nots, find relevant places to put it or hide it. Bring dirty clothes, sheets and towels to the laundry room. And do a load or two... or at the very least separate them.
Helpful tip: If you don’t want to deal with organizing or putting away your clutter, take a picture or make a note and shove it in a plastic storage container or cardboard box. When your guests leave, you can put your madness back into the method you were working with.
Step 2: Tackle the closets
Warning: This might get worse before it gets better. Since closets are an excellent place to hide, throw or chuck things, organizing them might mean taking it all out. But it’s necessary if you want to fit all the pieces back into the puzzle.
Helpful tip: Before you clean out your closet, it might be helpful to get a box, bag or storage container. There are a number of things, like your summer wardrobe, you can take out to make space for your guests’ coats, boots and shoes.
Day 3: Wipe Away The Gross
Hopefully you have recovered from the emotional toll taken by tackling your clutter. There aremore steps today, however, these tasks are more physical than mental. Put on your favorite playlist, follow the game plan, and put your mind on autopilot. You got this!
Step 1: Clear off and wipe down surfaces
It’s time to go back to your assigned rooms and put the wipe down on all the surfaces. If you did your Day 2, Step 1 task, this shouldn’t be too much of a lift. Spritz, spray and wash away the nastiness that has accumulated since you last cleaned.
Helpful tip: Bring a box or bag with you and put in used rags, towels or whatever garbage you find.
Step 2: Windows, walls and baseboards
Windows can be a bit of a time suck, so just get the smudges and move on to the walls. Wipe down or dust your walls with a slightly damp rag. After that, go ahead and dampen the rag a little more and clean all the window and door trim as well as the baseboards. And banisters. Don’t forget those.
Helpful tip: A cloth towel or rag will be your best friend. Paper towels are annoying for this task, but will work in a pinch.
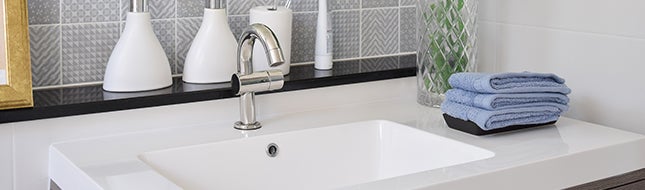
Step 3: Deep-clean the bathrooms
Bathrooms are thegrossest places to clean. It’s important to move fast and don’t stop. One thing that can slow you down is not having everything you need. So get yourself a bag of dry rags, glass cleaner, disinfectant spray, toilet bowl cleaner and a toilet bowl brush.
Helpful tip: Clean from top to bottom, left to right and back to front. And don’t forget inside the medicine cabinet. It’s not rare for guests to get a little snoopy.
Step 4: Kill the dust
Go through every room and wipe down all the surfaces that haven’t already been wiped down. Start with the lights. Dust and clean the insides, outsides and even the bulbs themselves. And don’t forget the tops of bookshelves, picture frames, ceiling fans and other hard-to-reach places.
Step 5: Keep doing laundry
By now most of the dirty clothes, towels and other machine-wash safe fabrics have been unearthed and should hopefully be piled up in the laundry room. Again, don’t let laundry build up. Wash. Dry. Fold. And put it away.
Day 4: Kitchen and Common Areas

Now that the grossest part of your cleaning list has been completed, it’s time to take on the kitchen and common areas. Thankfully, from here on out, the tasks will get easier and easier, and soon they’ll all be done. And the same as yesterday, playlist, game plan, autopilot. You’re really doing it!
Step 1: Clean the fridge and do the dishes
Cleaning out your fridge is crucial. This will help free up space for holiday goodies. Then take all the hard-crusted and slightly moldy bowls, plates and storage containers from the fridge and add them to your to-do dish pile. And wash, rinse, repeat.
Step 2: Clean the oven, stove and range
First, spray your cleaning solution on the stovetop and inside the oven. This will give it time to breakdown cooked-on debris. If you have a range, wipe off all the greased-on dust. Maybe take a quick break to make sure the solution has done its job, then hit the stovetop and inside the oven.
Step 3: Time for appliances, cabinets and containers
Get yourself a fresh rag and wipe off the fronts, sides, tops and edges of all appliances and cabinets. Your arm might be a little tired so don’t be afraid to switch hands and/or stance. Next, take out the trash and recycling and wipe down the containers, inside and out.
Helpful tip: Microfiber towels are best. Get a lot of them—dirty rags are your enemy and can be counterproductive. Speaking of counters...
Step 4: Counters and sink
It’s time to hit your counters with the good ol’ spray, swipe and repeat. Easy-peasy. Next, using a little baking soda, scrub the sink and drain. If you have a garbage disposal, baking soda and vinegar will work wonders.
Helpful tip: If your garbage disposal smells, nix the odor by grinding up some lemon peels or the peels from the citrus fruit of your choosing.
Step 5: Couches and chairs
Depending on your lifestyle and furniture, couches and chairs can be pain to clean. For fabric, vacuuming will be awkward yet very, very necessary. For your smooth-surfaced sitting options, a simple wipe down should suffice.
Day 5: Floors and Finishing Touches

Ahhhhh, sweet baby angels, we’re almost done. Today is your last day and shouldn’t be too difficult. Just a quick surface refresher and all the floors and the cleaning is done. All that will be left is your finishing touches, which actually could be spaced out or done the night before.
Step 1: Another quick wipe-down
It’s time for one last wipe down, just in case any dust or debris has been kicked up from your normal day-to-day activities. And don’t forget to wipe down exterior doors, knobs and handles. Everything from the top down should be clean, leaving whatever wasn’t picked up on the floor.
Step 2: Sweep, vacuum and mop
As mentioned in the previous step, your last and final step will be to clean up all that has been cleaned off everything else. Start with vacuuming from top to bottom and front to back. Then it’s time to sweep and mop using the same top to bottom and front to back technique. If you don’t have time to deep clean your steps, do your best with visual touch-ups.
Step 3: Finishing touches
The house is clean, the garbage is out, and everything is sparkling-ish. But do a quick walk through to make sure nothing has been missed. After that, it’s time for the finishing touches, including (but not limited to), fluffing pillows, filling or putting out new soap, fresh bathroom towels and clean kitchen rags.
Helpful tip: Use your tactical to-do list during your walk-through and check off or cross out all of the completed tasks... or internally justify why you didn’t do them.
Step 4: Decorate and add a fresh scent

Depending on your holiday decoration inventory and energy level this can be as big or as little as you want it to be. Breakout the fancy placemats, dishes and stemware, and to add to the ambience, light up or plug in your choice of holiday scent(s).
Helpful tip: Putting a few drops of vanilla oil in your air filter or on light bulbs can be a perfect out-of-the-way scenting option.
And there you go
Good luck. Godspeed. And happy holidays!